Snowman 12 tutorial
=====================

PNL
El contorno es mío, puedes utilizarlo para hacer firmas, sigtags, adopciones....
Le contour m'appartient, vous pouvez l'utiliser pour en faire
des signatures, adoptions...
This outline is mine, you can use it to make sigtags, adoptions..

Descargar el material aquí
Téléchargez votre matériel ici
Your supplies are here
Por favor, siempre crédito a http://design.cuquialonso.es/SildabiaBP
S'il vous plaît, donnez crédit à
SildapiaBP à http://design.cuquialonso.es/SildabiaBP
Please, give credit to SildapiaBP at http://design.cuquialonso.es/SildabiaBP
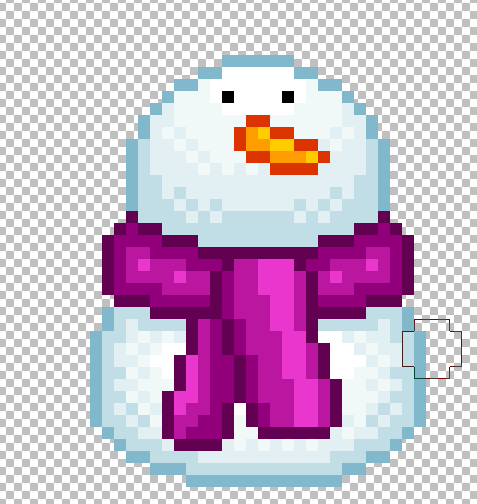
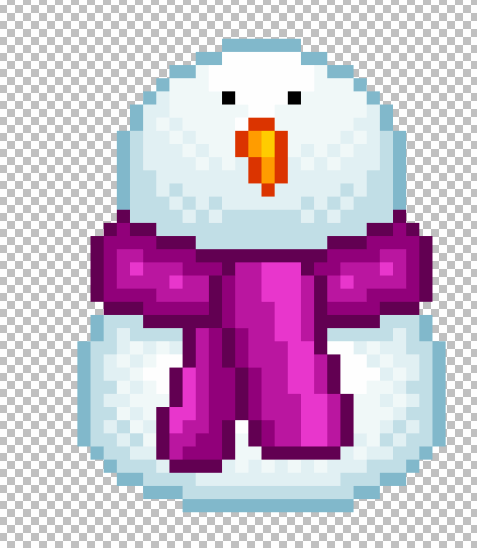
En este tutorial, usted puede aprender a animar un dibujo pixel.
Vamos a utilizar 6 imagenes de un mismo hombre de nieve, con diferentes posiciones.
Usted puede abrir el material en .psp en su Paint Shop Pro y trabajar cada capa individualmente. Cerrando previamente las capas que en ese momento usted no va a pintar. Una vez todas las capas pintadas, abra los ojos a todas las capas y Guarde el archivo como .psp (para abrirlo con animation shop y poder hacer la animación).
O bien, usted puede abrir uno a uno cada imagen del muñeco de nieve y trabajarla. Luego guardarla como .psp.
Despues abrir todos los archivos trabajados de muñecos de nieve. Copiar y pegar cada uno de ellos como nueva capa, en el archivo del primer muñeco. Así usted obtendrá un archvio .psp con 6 capas.
Abrir su resultado .psp con Animation Shop.
Dans ce tutoriel, vous apprendrez comment animer un dessin
pixel.
Nous utiliserons 6 images similaires : un bonhomme de neige avec des positions différentes.
Ouvrir le matériel : sbp_snowman_moving_suplies.
Travailler sur chaque calque l'un après l'autre. Fermer
les calques sur lesqiuels vous ne travaillez pas. Une fois tous
les calques finis, ouvrir tous les calques et enregistrez le fichier (à ouvrir avec animation shop
pour faire l'animation).
Ou vous pouvez ouvrir une image bonhomme de neige à la
fois et travailler sur chaque image l'une après l'autre.
Puis enregistrer pour ouvrir dans AS.
Si vous utilisez la première méthode, ouvrir votre
animation dans AS ou si vous utilisez la deuxième méthode,
ouvrir les 6 fichiers et les copier coller l'un après
l'autre de façon à avoir une animation avec 6 images.
Ouvrir AS.
In this tutorial, you
will learn how to animate a
pixel drawing.
We will use 6
similar images of a snowman,
each one with a different position.
Open the supplies:
sbp_snowman_moving_suplies in Psp
and work on each layer one after the other.
Close the
layers you are not working on. Once all layers
have been done, open them and save as a psp file.
Or you can open each snowman image
one after the other and work
each one
individually.
Save each
one as you complete it.
If
you used the first method, open the file with the 6 images
in AS. If using the second method, open your 6 individual
files in AS and copy paste each file one after the other
to create an animation with 6 images.
Animation Shop psp.
Select F:1 -- Animation / Frame Properties / 90
Select F:2 -- Animation / Frame Properties / 40
Select F:3 -- Animation / Frame Properties / 70
Select F:4 -- Animation / Frame Properties / 50
Select F:5 -- Animation / Frame Properties / 60
Select F:6 -- Animation / Frame Properties /300
Salvar y guardar como .gif
Para añadir este resultado animado (the snowman gif) a una escena (un background escena)..
Usted debe hacer una escena estática y añadir su nombre.
Despues abra su escena estatica en Animation Shop (edición/copiar). Usted duplique su escene 5 veces más (ctrl + L = 1 duplicado)
Comprobar los valores anteriores desde F:1 hasta F:6 y salvar y guardar como gift.
Así usted obtiene una
escena con 6 capas estática.
Ahora usted debe copiar y pegar en Animation Shop su snowman gif a la escena estática.
Para ello:
Abra su snowman gif (previamente guardado como archivo .psp) en su Animation Shop.
Usted tendrá 6 capas.
Y Abra su escena estática en su Animation Shop. Usted tendrá 6 capas.
En la imagen del snowman: edit / select all; edit / copy
Ir a la imagen estática: edit / select all; edit / paste into selected frame.
Salvar y guardar como gift
Pour ajouter ce résultat (snowman gif) à une scène animée (a background scène),
vous devez créer une scène
et y ajouter votre nom.
Ensuite, ouvrez votre scène dans Animation Shop (Edition / Copier),
en faire 5 autres copies (ctrl + L = 1 double) pour
avoir 6 images en tout.
Vérifiez la vitesse pour chaque image et enregistrez en
gif.
Maintenant, vous devez copier et coller dans votre
animation bonhomme de neige dans votre petite scène.
Pour ce faire:
Ouvrez votre bonhomme de neige (fichier préalablement sauvegardé. PSP) gif dans Animation Shop.
Vous avez 6 images.
Cliquer sur la première image de l'animation bonhomme de neige: sélectionner tout, copier
Puis cliquer sur la première image de votre scène. Sélectionner tout, coller dans l'image.
Enregistrer en gif
To add this result (snowman gif) to a scene (a background scene). You must
first create
a little scene and add your name.
Then open
this scene in Animation Shop (Edit / Copy).
Duplicate (ctrl + L = 1 duplicate)
to have
6 images.
Check
the
speed for each frame
F 1 to F 6 and save as
gif.
So you
now have a scene with 6
frames.
Now you must copy and paste
your animated
snowman into this little scene.
To do this:
Open your snowman gif (previously saved file. Psp) in Animation Shop.
You will have 6
frames.
And open your static scene in Animation Shop. You
also have 6
frames.
Click on the first
image of the snowman animation then Edit > Select all, edit
> copy
Go to the
little scen, click
on the first frame and then
edit / select all, edit / paste into selected frame.
Save
as a gif.
1.- Sample of my Dithering.
1.- Echantillon de mon Dithering.
1.- Muestra de mi Dithering


4.- Mi resultado. 4.- Mon résultat. 4.- My result

Yo espero hayas disfrutado con este tutorial. Puedes añadir una bonita escena. En la mía, tubos por mi
J'espère que vous avez apprécié ce tutoriel. Vous pouvez
y ajouter d'autres éléments pour créer une belle scène.
J'ai rajouté des tubes pour moi
I hope you had fun with this tutorial. You can add
other elements and create a beautiful scene. In mine,
I
added tubes mine
>>RESULTS PAGE<<
Tutorial by PNL - http://design.cuquialonso.es/SildabiaBP
Thanks to Martine for you help with English and French translations